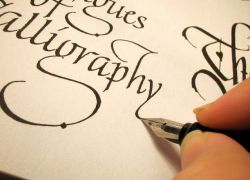
Calligraphy how to learn to write beautifully. What is calligraphy? Beautiful handwriting
At present, it is very important to know how to learn to write beautifully in calligraphic handwriting, since accurate handwriting can play a role in finding a job, in a career, and even your own.
In fact, the handwriting begins to form back in the school years, when the student is still just trying to learn how to hold the pen, sits at the desk incorrectly. For those who are interested in how to learn to write in calligraphic handwriting, it is necessary to repeat some very important rules.
- It is necessary to properly equip the workplace. To do this, you need to prepare several pens, a notebook in a ruler and a cage, samples of words and several blank sheets of paper. There should not be any objects on the table that will interfere.
- It is very important to learn how to sit properly, then the handwriting will become better and more accurate over time. The back and shoulders should be straightened, the head should be tilted slightly forward.
- In order to learn how to write beautifully, you should hold the pen correctly. Everyone begins to learn this skill at a school desk, but not everyone gets it right. The handle must be fixed on the left side of the middle finger, while holding it with the index and thumb.
When the workplace is ready, you can begin to practice and then it will be easy to understand how to write in calligraphic handwriting. A few tips for beautiful handwriting:

Of course, it’s much more difficult for an adult to sit at a desk and remember calligraphy lessons than a schoolboy. Learning to write in calligraphic handwriting is not easy, but you can still acquire skills by spending a lot of time. Using the above tips, there will no longer be questions about how to write a text or a business document in calligraphic handwriting.
After ornamental exercises, you can proceed to the execution of the antique font with a pen.
Try to write it large.
It is not recommended for exercises to write letters in alphabetical order; this is methodologically incorrect. When performing exercises, letters are grouped by similarity of styles. The common elements of similar letters are continuously repeated until their spelling is learned.
We start the exercise with the letters of the 1st group, consisting only of vertical and horizontal strokes - G, E, H, etc. Then we write the letters of the 2nd group, consisting of vertical, horizontal and inclined lines - A, G, I, etc. They are followed by the letters of the 3rd group, in which straight strokes are connected with the round ones - B, C, H, etc. The 4th group writes round letters - Z, O, C, etc. After uppercase letters, you can begin to write lowercase, also distributing them among the indicated groups.
Font made with a wide-nib pen. The arrows indicate the direction of the strokes, the numbers indicate their sequence.
For letters marked with an asterisk, see the illustration below.

Improving the rhythm of strokes in letters written with a wide pen. Above are letters written according to the logic of a wide-nib pen (without turning the pen). At the bottom - (recommended at an advanced level) writing letters with a pen rotation when writing left-sided diagonal elements.
Learning to write the same letters and perfectly smooth lines, you can go to writing words and whole sentences. For a variety of compositional solutions, it is necessary to write letters of both large and small sizes; Prose text alternate with poetic. As, for example, in the work of Lyubomyr Kratky.

Lubomir Short (Lubomir Kratky).
Extrait du "Petit Prince", de Saint-Exupery.
1987, 50x40 cm.
Paper, paints, crank brush.
Pen Exercises (Part II)
Studying fonts and tricks, you can resort to the copy method. They copy both historical handwritings and the best works of modern masters, rewriting them with a wide-nib pen. The size of the original is optional.
The exercises below will help you learn how to write italic font. You need accuracy and perseverance, and you yourself will not notice how everything starts to work out.

Pay attention to the fact that inexperienced text usually usually turns out to be rare at first, then it is condensed, and in the end it may thinn again under the influence of the writer’s fatigue. This phenomenon most often occurs with long texts and makes the overall picture of the font uneven. In order to keep the font density the same, it is recommended to mark the text with a pencil in advance, and write several test phrases on paper for control. It may happen that from a gradual increase in pressure on the pen, the text at the end of the letter will be darker than at the beginning. From time to time, check the first line to determine if the initial proportions and rhythm of the letters are respected, as well as the inclination of the pen.

Exercises and patterns for learning italics with related letters.
Many beginners too hasty move from the initial exercises to writing complex letters. Such a rush leads to sloppy writing, violation of style unity in the characters of one alphabet. Exercises should be done carefully and methodically, despite the fact that the stroke due to the slow movement of the pen is uneven. Speed, if it is appropriate to talk about it when performing the font, comes later, as if by itself, along with the stability of the hand.

Gunther Junge
Font variation.
Pen Exercises (Part III)
Only after a long training session, when the implementation of well-known font styles is fully assimilated, can we gradually proceed to develop an individual style, or rather, it develops itself in the process of exercises. This can be compared with the transition from student handwriting to handwriting of an adult. Individual handwriting means not only the alphabet created by the writer himself, but also (for the most part) the individual transformation of some famous style without a fundamental change.

Exercises and patterns for learning italic typeface with related and unrelated letters.
Very often, when decorating a font, they try to give all letters or their most characteristic elements a homogeneous character, subordinate them to a "single style", ignoring the features of this font and the specifics of its type. In italics, this manifests itself, for example, in attempts to connect all the letters among themselves without fail in one way, although it is known that some letters are well connected by the upper connecting stroke, others are worse, and others cannot be connected at all by this method. This danger should be taken into account by the beginner, remembering that the unity of style is a relative concept that requires action.
It is very strictly necessary to make sure that the vertical strokes (in the oblique font - oblique) are parallel, otherwise the letters seem to stagger and the font loses its rhythm.

Exercises and patterns for learning italic fonts with unrelated letters.

Various techniques for performing serifs.
The pattern and proportions of the letters must not be allowed to suffer due to the use of a pen with a too wide or too thin end.
A tightly compressed font is more decorative than normal, but less readable, so it should be used with caution. The same goes for a font with too narrow line spacing.

Oldrich Menhart.
Samples of the performance of some lowercase letters.
I would like to once again note that skills in the technique of working with a wide-pointed pen are acquired, of course, in the process of directly executing a font.
Pen Exercises (Part IV)
A round pen is one of the simplest tools for writing a font. The end of the pen has a disk-shaped line of the same width regardless of the direction of movement of the pen. Round-end feathers are made in widths from 0.5 to 5 mm.
In the process of writing, the entire disk-shaped surface of the pen should evenly fit on the paper. If this requirement is not met, the line is uneven, of unequal width. A round-nib pen, like a broad-nib pen, should not be directed end to end, i.e. bottom to top and right to left.

Ornamental exercises using the round pen technique.

A grotesque filled with a circular pen. The arrows indicate the direction of the strokes, the numbers indicate their sequence.
The round-shaped pen is mainly used by amateur type designers when carrying out signage, announcements, etc. It is also used in the performance of the standard font in technical drawings. A round-nib pen helps the student acquire basic skills and disciplines the hand and eye, but it is almost not suitable for a full-fledged, highly artistic font. A processional artist uses a round-shaped pen less often than a wide-pointed one and for the most part as an aid in drawing a font (for example, a chopped one). Sometimes the line of a round pen or the ends of letters is modified with a drawing pen or watercolor brush.

Handwritten headset Zhikharev.
Typographic font.
Artist I.S. Zhikharev.
Moscow, 1955.
It is easy to reproduce such a font with a round pen, having modified the elements of letters with a thin pen.
Many people complain about their handwriting, they say, he is ugly, clumsy and stuff like that. And they don’t even realize that you can easily learn to write beautifully. What can I say, in fact, there is a whole science of writing, and its name is calligraphy. This is not even science, but rather, which everyone can learn. Right now we’ll talk about what calligraphy is and how you can begin to learn it.
What is calligraphy?
As already mentioned above, calligraphy is an art and, most importantly, its purpose is a clear letter. The first mention of calligraphy was noticed back in the sixteenth century in Europe. This term meant the letter that stood out for its beauty and clarity of letter shapes. However, it was only in the sixteenth century that the letter was defined, and the origins were discovered long before that. In fact, this art originated at the time when people began to use symbols to transmit information, and it was from that time that it began to develop.
For example, in Ancient Egypt, another four thousand years BC, the Egyptians used hieroglyphs, and this also fits the definition of calligraphy. This was replaced by the Greeks (three centuries BC). And from about this moment on, letters from various techniques were seen in all corners of the world.
In the eleventh century, Italy was already written with beautiful, subtle characters, outlining each letter. At this time, the so-called Gothic style came into fashion, which still remains popular.
So, and how it originated, we already learned, now let's move on to the training part and touch upon a section such as calligraphy for beginners.
Fake calligraphy
Fake calligraphy is the same as regular calligraphy, the only difference is that fake pen is not needed for fake. For beginners in this business, this is what they need. Now we will discuss how to write beautifully, so that it is not clear whether it is fake or not. Moreover, the surface is not important for this type of writing. Of course, all aspects will be affected, but later. After all, now we have calligraphy for beginners. So, it’s worth turning to the basics.
So, we start the calligraphy lesson with a simple phrase in italics. It can be absolutely any, now the main thing is to understand the technique itself. For simplicity, you can take the characters that are shown in the image below with text on the left. It is important that all letters are interconnected.
Once you have written letters with a pen, you need to thicken them. This time you can also refer to the picture with the text in the center. In principle, the technique is simple, thickening is done only on vertical lines, at the transitions to the horizontal lines merge.
As soon as you have finished drawing thickenings, proceed to painting the space inside.
Now you know what fake calligraphy is. After a couple of attempts, you will learn how to quickly write with this method and understand the very basics of calligraphy. Well, in the meantime, we will move on to the tools necessary for calligraphy with a fountain pen.

Instruments
A calligraphy lesson cannot do without mentioning the basic accessories for it.
Let's start with the holders. For beginners, the best option would be a cortical or plastic holder. At least it is more profitable.
We pass to feathers. There are an unimaginable number of them, and each of them is good in one way or another. But in order not to bother you with the excess of incomprehensible phrases, it is necessary to say only one thing, that for beginners the best choice would be one of the three pen options:
Brause Extra Fine 66.
It is up to you to decide which one to choose, but at this stage their difference will not be noticeable.
Now let's talk about how to properly insert the pen into the holder. First of all, you need to make a wedge. It is located between the metal rim and the petals. By the way, the pen is not mounted in the center, but always from the side, as shown in the photo.

So, the holder and the pen are assembled, now let's talk about what we will write on, that is, about paper. The fact is that any of us will not work. If you have the opportunity to visit a theme store, then they will quickly pick up the necessary paper for you, well, if not, then choose the material for the sketches or one that does not absorb the ink very much. Otherwise, a spider web will appear.
We will not dwell on ink for a long time, it is only necessary to mention that it is better to buy Speedball or Sumi. And also do not forget to draw water into a glass. You will dip a pen there very often.
Writing technique
By the way, before proceeding to the correct spelling of the calligraphic font, it is necessary to clarify that Russian calligraphy is no different from any other, and the rules work the same for everyone.
Initially, it’s worth talking about how to properly hold the fountain pen. Of course, for starters, you can use the technique, as with a ball, but still it is worth doing as shown in the photo. It is only important to hold it tight. The little finger with the nameless is a support to the surface. The middle finger simply supports the handle, and the thumb and forefinger hold it.

Once you have practiced, you can start writing. Dip the pen into the ink until it reaches the middle of the well. Now proceed.
It is also worth mentioning that ballpoint and differ. While the usual pen needs to be rude and push on it, the pen needs to be handled gently, otherwise there will be splashes with excessive pressure.
A couple of secrets
Calligraphy of writing is, of course, not an easy task, but for beginners, it sometimes happens, it comes to the point of absurdity. Now we will talk about its various manifestations and we will warn you against failures.
Imagine you assembled a pen, learned how to hold it correctly, dipped it in ink, and are ready to start creating, but as soon as you try to write something, the ink flatly refuses to switch to paper. An inconvenient situation, yes. But there is a way out. All you need to do is touch the water with the tip of a pen, then ink will start to write with pleasure.
It also happens that the ink clogs in the pen. Most often this is due to the fact that they are old. To avoid this problem, it is necessary to place the pen in water and have a good chat. After that, take a soft cloth and wipe it properly.
It is also worth mentioning that you can always find examples of various calligraphic fonts and already try to repeat them yourself. Thus, your calligraphy will be improved. Copybooks (example) are presented in the photo below.

Conclusion
Well, that seems to be all. For beginners, this information is enough with a head. Calligraphy is not an easy task, and practice is necessary to learn it. And since the topic of the article implies information for beginners, it makes no sense to tell something more complicated.
And know: if something doesn’t work out for you, do not despair. From the first time no one achieves anything. Over time, you will learn all the tricks and be able to show off your beautiful letter to friends.
Over the past few years, I have conducted seminars in which I taught newcomers to modern calligraphy. And I also answered countless related questions by e-mail. Therefore, I realized that it is necessary to create a post that will help you learn calligraphy from scratch! Today I will tell you how to master this art with a few simple steps.
1. Master Fake Calligraphy
In my opinion, fake calligraphy - created with a regular pen (gel, ballpoint, etc.) and not a pen - is the best first step on the way to working with a pen. I think so for two reasons:
- An ordinary pen looks more familiar. You use it all the time, and you can use it to build muscle memory (later it will come in handy).
- Fake calligraphy will be useful not only for beginners. Whatever your level, this will be an excellent tool for working on some projects. For example, a nameplate in Amy Style font is in the photo below.

Any set of calligraphic words-templates that can be downloaded from thepostmansknock.com starts with fields for fake calligraphy. If you don’t have one yet, I recommend the Amy Style Kit. This font is distinguished by straight vertical lines. Therefore, it is ideal as an initial stage of work, both with a pen and a pen, for right-handed and left-handed people. After practicing a couple of weeks in fake calligraphy and having a good hand, you can take up a pen.
2. Putting together a starter kit for modern calligraphy

A detailed description of this set can be seen in the post "The optimal starting set of feathers for modern calligraphy." Here is a list of the most necessary tools and links to them:
- 2 pointed nibs by Nikko G. - Why I think this type of feather is the best for beginners, you can find out on this link. (Do not know how to distinguish feathers? Look at the markings on the shank of the pen. It shows the manufacturer, for example, “Nikko G”, “Brause EF66”.)
- 1 straight pen holder. - I use Manuscript holders with a universal flange. Although any direct model will do. I like the General Cork Cradle Holders because they are comfortable to hold and universal too.
- 120 g / cm2 (32 #) laser printing paper - This is an inexpensive and high-quality paper, on which mascara will not spread and spread.
- Sumi Ink Mascara and Ink Bottle with Threaded Cap for Mascara Storage. (You can also use Indian mascara). Both varieties are quite saturated and with optimal viscosity.
- Art glass. “Essentially, just grab a glass of water.” You will need it to rinse the feathers.
- Non-fibrous material (e.g. dining napkin). “Paper towels will do.” But their fibers will constantly get stuck in the slits of the pen.
I suggest you collect the calligraphy set yourself, and not buy the finished one. As a rule, they consist of low-quality tools, unsuitable for beginners. In addition, their price is often overpriced.
3. Wash feathers
All feathers are covered with a layer of factory oily grease that retains their presentation until the time of sale. Before use, you need to remove it. To do this, I often just stick a feather in the potato! You will find out how and why to do this in a post by link.

After removing the grease, the mascara will drain smoothly and evenly over the pen. If this is not done, the pen may not write at all, or leave blots.
4. Cooking pen

You can use a plastic Speedball holder. But I advise you to purchase a model with a universal flange. It is equipped with four metal “petals” and a ring, as in the photo below. Such a holder can be used with many feathers of different sizes, and not just with any one look. To learn more about the different types of direct holders, read the post here.

This is what the feather holder with the universal flange looks like.
If your holder looks like the photo below, then you need to slightly bend the petals inward. Often they are sold in this form.

To learn how to do this, watch the video below.
Having dealt with this, you can proceed to fixing the pen. Insert the shank of the pen exactly under the hole in the ring, as in the photo below.

If it doesn’t work out, watch the video below.
With the correct location of the pen, it should firmly, without staggering, sit in the holder.

Your pen is ready to go!
5. How to hold a pen


Hold the pen in the standard way, like a regular pen. Grip the holder between your thumb and forefinger, leaving the middle finger on the back of the handle. Let your little finger and ring finger rest on paper while you write. Read more about how to hold a pen right here.
6. Dip the pen in the mascara
Whatever pen you use, always lower it into the mascara no deeper than the level of the hole in the center of the pen. Otherwise, you will pick up too much carcass, and it will fill the entire sheet as soon as you touch the paper.


After collecting the mascara with a pen, lightly tap it with a glass of water, shaking off the excess.
7. Start mastering modern calligraphy!

This is the “Intensive Word Processing” section of the Janet Style recipe template set.
The main difference between ballpoint pens and feathers is this: when drawing letters with a pen, you need to keep the same angle between the pen and paper. Do not keep it upright, try to maintain an angle of 45 degrees. If the angle is too large, the pen will cling to the fibers of the paper, because of which the mascara will lie unevenly. It’s hard to learn the right technique without seeing it. To make it clearer, I shot this video.
Before starting any calligraphic project, I advise you to practice on copybook templates (again, Amy Style is a great choice, because there’s a video course on working with it). Print copybooks on laser printing paper and enjoy the process!

Common problems
The experience of teaching modern calligraphy has given me a unique opportunity to understand the difficulties and distresses that beginners face. Here is a list of six major problems and their solutions:
- The pen clings to the paper. - Reduce the angle between the pen and the paper. The higher you hold the pen, the more difficult it will be for you to work.
- Mascara is not evenly distributed. - The output is the same as in the previous case: try to observe a smaller angle of inclination of the pen.
- Cannot draw a line of the same thickness. - Make sure the tip of the pen is firmly and evenly pressed against the paper and you are holding it correctly. A video course can help you.
- Mascara is spreading. - This happens due to poor quality paper. Make sure you are writing on high quality paper (for example, 120g / m2 laser paper).
- Your hand is trembling. - Read the post “Solving Calligraphic Problems: Pen Press and Trembling Hand”.
- Other problems. - Read the post “Five Frequently Asked Questions about Modern Calligraphy.”
What to do next
In modern calligraphy, as in other classes, the most important thing is to constantly improve your skills. Everyone starts with something. I started like this:

And here is one of my last works:

For starters, the best practice would be recipe templates. Again, for beginners, I recommend Amy Style, although any set from thepostmansknock.com will do. While you are only getting acquainted with the forms of letters, pick up interesting projects for yourself. Engage in other types of art related to calligraphy (like this way of creating signs) and / or write nameplates on the table for the next event. Use the search engine on thepostmansknock.com. Now there are more than 300 articles on calligraphy training and various projects. While studying brings you joy, your skills will improve.
I hope you enjoyed this beginner's guide to mastering modern calligraphy. You can ask any questions in the comments. Thanks for reading my post. Have a great day!
An overview of the popular tools used in calligraphy by LiveJournal user - barbariskina.
The article is useful not only for those who are going to master calligraphy, many tools are also applicable in lettering.
Probably few of my friends do not know about my passion for calligraphy. I started about a year ago with a two-day intensive, in the introductory part of which we were told about the main tools, and there was an opportunity to try them out.
And in this article I want to tell you what I tried to write during this time, what came of it, and what I use now. I admit right away that I am not studying at all according to the rules, with the exception of the recent course on brushpen and a couple of master classes - on my own, going a little deeper into classical writing.
But, in my defense, I want to say that I didn’t have the task of mastering calligraphy in all styles and from scratch, but rather - to enjoy the process, understand the logic of tools, which is good for my font pictures. Plus, I have a decent design experience and understanding of the basics, and this is enough to get more or less nice things in free modern styles.
Well, the world of calligraphy is so vast that on which side you should not approach - digging and digging anyway))
Tools for Beginners
For beginners, the following order will be correct: the simplest tool, prescriptions (it is better to write a little and often than rarely, but 5 hours in a row), then - look at the works of the masters and copy them. If possible - go to master classes, communicate with like-minded people. Gradually, when you immerse yourself in the topic, understanding and your own direction, your tricks, and an individual style begin to take shape.
The basic tool that is just recommended for beginners to start with is the wide-nib pen. They write both classical types of writing: minuscule, Italian italics, Gothic, etc., as well as free modern styles. Of this variety, I tried only Gothic and not for long.
To get started, try writing with classic wide feathers. Better - with a staple holder, this is such a plate fixed on the feather, so the carcass is enough for a longer time. My mascara is the most ordinary, Gamma or Kohinor, white - ordinary gouache. You can start with Italian italics or Gothic, you can find a lot of information from the prescriptions, everything is quite simple there, the main thing is to observe the pen tilt and develop a hand.

If after acquaintance and exercises with ordinary feathers there is still a desire to continue (or you can afford to buy tools more expensive without an accurate understanding of whether you will use them), then you can spend money on the Pilot Parallel Pen. This is a refillable automatic pen, its main convenience is that you don’t need to constantly dip your pen into the mascara, you can carry it with you and train anywhere. I have 2 sizes - 6.0 and 4.8 mm. There are 2 smaller sizes, but they are rarely used. And for beginners, the greater the contrast of the stroke, the better.

Cartridges can be purchased separately, or can be refilled with regular ink (not ink, but water-based inks). I fill with Gamma, with a regular syringe without a needle, I put the cartridge in a binder, I hope that everything is clear from the photo. Pros - cheap and not a pity, cons - ink is poorly washed from the fingers)) Another advantage of the “parallel” is the ability to write with a thin edge and change the pressure and position of the pen when drawing a line. So you can add interesting decorative elements. And when quickly carried out, especially on textured paper, such a pen “slips”, the strokes are obtained with a very interesting, ragged texture.
Calligraphy brushes
When the letters begin to turn out more or less confidently - you can try flat brushes for the same types of writing. It’s a little more difficult to write with them, they are not as obedient as feathers, more plastic, but this is also their charm. I heard that there are cropped flat feathers for calligraphy, but I haven’t seen them in Kiev shops. As tools you can adapt everything that’s enough for imagination - a sharpened wand, glued toothpicks, a plastic card, I sometimes write in large formats with a foam sponge (or whatever it is).

Examples of calligraphy "parallel" and flat brushes


In general, my passion for calligraphy began with a pointed pen. There are also a bunch of species and schools, more classical (like cooperplate), decorative (flourish) and more free (French style). What I tried to write is closer to the last one most likely.

With feathers - the question is complex, they are sold some unrealistic amount in foreign online stores (for example, www.scribblers.co.uk or http://kalligraphie.com), but in local stores - the choice is not happy. From what I found in the city and tried, Leonardt 256 (1) seemed the most suitable for beginners, it does not scratch the paper and does not require masterly possession. Still with almost the same qualities - HIRO Leonardt No. 41 (2). Now my favorite feather - Leonardt G (3), very plastic, obedient, gives a good contrast, but a little practice before using it will not hurt, probably.

Two more interesting nibs (but these are already for advanced ones) in my modest collection - blue Leonardt 40, give a stunning contrast to the line, but require careful handling. And Leonardt 801, it’s mainly for coperplate, it’s impossible to write without a lamp holder) By the way, about lamp holders (homemade under the feathers in the photo), they are almost impossible to find in our stores, so they are often cut out of tin or wrapped with a thin wire, which I usually do.
Examples of work with a sharp pen:


Brush foams
And finally, the most used tools are brush foams) The first thing I tried to write about was markers, simply because they already were. Copic Sketch (4) seemed to me too soft, Letraset Tria (3) is already better, but Faber-Castell Pitt (1,2) is still very popular, I can quite recommend them to start, to understand the logic of the instrument and make first exercises. Their price is acceptable, and there is a pleasant resilience, which I miss in other tools.

Small life hacks from me - the tip can be pulled out a little, and when it is disheveled - pulled out and turned over. They have enough paint for a long time, I have run out of some colors after a year of irregular sketches and a month and a half of persistent and numerous calligraphy classes. In addition, Fabers do not require special paper, unlike alcohol markers. But creak, the husband complains))
With about the same tip, but a little thicker - Marvy Brush (9), also quickly killed. Of the refuelers I tried - Platinum Pocket Brush Pen (7), nice, but its tip wears out faster than expected, and you can’t refill it with ink, you need to buy native cartridges.

The most common and fairly convenient version of the pen brush is the Pentel Pocket Brush Pen (8). Automatic, refillable, water based inks - suitable. I fill in the same way as in the "parallel", only better with a needle, the hole is small. Although not cheap, but their main advantage is that the tip is not solid, but in the form of a brush, because of this it does not wear out, is very plastic and pleasant to work with.

But most of all, I still like water brushes, I have Aquash Pentel Watercolor (5) and Sakura (6). There are different sizes, the tip is a brush, like the previous pen, I did not notice much difference in behavior, and the price is more humane, and you need to refuel less often. You can fill the tank with water and paint with watercolors, you can already diluted watercolors, you can use ink (I dilute it in half with water).
Well, the same techniques can be used for writing with ordinary round brushes, they require a little more confidence, but they can be written in large formats. This is very cool and very useful sometimes to do the work from the shoulder, the arm loosened.
In general, for brashpenes I have ideas about the perfect instrument, but while I'm on the lookout)) There are a lot of them actually, there is still something to try. By type of writing - just an unreal variety, full freestyle. So far, everything is about the same for me; there is still no such ease and the developed “calligraphic vocabulary”.


But from the picture with copies of the works you can see how different the results can be.

And here you can see why I need a binder to refill ink cartridges)

Homemade ColaPen
And I will add another interesting tool that is made independently of tin - ColaPen (last photo). The name just came from Coca-Cola, but their tin is soft, the lids for opening canned food are well suited. The cutting pattern in the internet can be found, a “spatula” is cut out, folded in half. The tool is very curious, not always predictable, gives cool effects. Depending on the position, the line is thicker or thinner, specific torn edges, bumps, splashes and smudges appear. I recently tried to make it, really like it, it helps a lot in the fight against perfectionism))

A few words about paper: I write prescriptions on ordinary office paper, I put a lined sheet down, this allows me not to mark everything up every time, and not to print rulers. Kokhinorovskaya ink (I often write blue) nicely fits on a regular Whatman. Interesting effects are obtained on designer textured cardboard or pastel paper, especially if you use white gouache to write on color (I tried it with a sharp pen and a flat brush). The same is true for crafting.
I bought 50 sheets of wrapping paper for practicing brashpenes, is sold in building stores such as Epicenter, is inexpensive, it’s not a pity to use, and a large format is always at hand if necessary. Tracing paper is also very useful, you can write with a sharp pen, I like it especially with white, and with brushpenes it glides nicely. Still tracing paper is indispensable, when bringing the inscription to the final version, it is applied to the original inscription, corrections are made, and this can be done several times, very conveniently. From my personal preferences - I really like the way they write brushes on coated paper, you can get hold of this good in copy centers.

That seems to be all that I use. This is a lesson for diligent and enthusiastic people, in general, due to enthusiasm, and it turns out to do so much exercise)) If it turns out crookedly - don’t be upset, this is normal, all the prescriptions go to the piggy bank of experience, the motor skills are honed, at some point “click through” and the lines begin to turn out smooth, and after a couple of packs of paper you will begin to understand where these lines can lead))

At first, everything needs to be done slowly and smoothly, do not be fooled by the ease and fluency of the movements of professionals, it will turn out so cool and fast a little later, with years of practice)) Of course, there is a nasty feeling that the immense cannot be grasped, but you can still achieve some success, here depends on your goals. Usually I see a lot of work on Interest, Beehance and other thematic sites, and then I console myself with the fact that these people have been only engaged in calligraphy for many years))
I would be glad if my experience is interesting or useful!